Let's say you've got an adorable mouse:

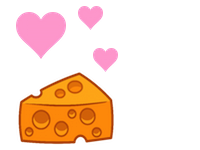
And you've got some yummy cheese:

And now let's say you need the two of them in the same line in an html document. You'd write up something like the following:
  <html>
  <body>
    <img src="imgs/Cheese.png"/>
    <img src="imgs/Mouse.png"/>
  </body>
  </html>
Then you get this:
Whoa, there, mouse! We all know your issues with self control! We need that cheese for our demonstration today!
Fortunately, we can use simple CSS to separate the two. In fact, there are several ways to push them around once we've defined them with a css class, like so:
    .blocked {
  display: block;
  }
Now that we've defined the class, we just assign the class to the mouse and cheese in a <div> tag, like so:
<html>
<body>
  <div class = "blocked">
  <img src="imgs/Cheese.png">
  </div>
  <div>
  <img src="imgs/Mouse.png">
  </div>
</body>
</html>
And voila! They're separated!
But wait, you say, we wanted them on the same line! You make a good point. We'll need to change our blocked class so that they're both enclosed in inline-blocks. Inline-blocks are pretty much blocks that don't expand to take up the entire row, and will allow other blocks on the same line. We'd edit our blocked class like so:
  .blocked {
    display: inline-block;
  }
Since we've already previously assigned the blocked class to the mouse and cheese, we don't need to make any changes to the html. That's part of the charm of CSS! After editing the blocked class, we get this:
Darnit! That mouse is at it again! We're going to need to use CSS to alter the inline-blocks to push the two apart. Again, CSS gives us several ways to do this, each with their own subtle effects.
To do this, we need to understand the elements that make up blocks. See the diagram (obtained from www.w3.org) below:

The margin is the area surrounding the block. The border is pretty self-explanatory; it's the border around the edge of the block! The padding is the area that seperates the border from the content of the block.
Margins
To make it a little easier to see the changes we are making to our blocks, let's add some color to the block with the following code added to our css class, blocked:
.blocked {
  display: inline-block;
  background-color: red;
}
Now let's see what our mouse and cheese are up to:
Perfect! Now that we can see the blocks, let's first try to separate the mouse from the cheese by exploring margins. We can change the size of a blocks margin by editing the blocked class in CSS, as shown below:
  .blocked {
  display: inline-block;
  background-color: red;
  margin: 0px 50px 0px 50px;
}
The four values we entered for margin are, in order from left to right, the number of pixels we'd like for the top margin, followed by the right margin, then the bottom margin, finally followed by the left margin. It pretty much starts at the top and moves clockwise. In the code above, we've requested a 20 pixel margin for the left and right margins, and no margins for the top and bottom. Let's see what we have now:
Notice how the area outside of the blocks has increased on both their left and right, pushing the mouse away from the cheese!
Borders
We can also try to separate the two using borders, either in addition to or instead of margins. We can add a border to our blocked class in CSS with the following code:
    .blocked {
    display: inline-block;
    background-color: red;
    border: 10px solid blue;
  }
The first entry for our border is the thickness of the border. The border produced by the border above will be 10 pixels thick. the second entry is the style of border we'd like to see. We want to contain that mouse so we're going with a solid border, but if you want to get fancy, you can always try a dotted or dashed border. The final entry is the color of the border. It's pretty obvious, but our border should be blue. Let's see what changes this code makes to our blocks:
Presto! The cheese is saved by the thin blue line!
Padding
The final way we can edit our blocks to save our cheese is by editing the padding of the block. If you'll remember, the padding is the area between the border and the content of the block. If we want to change the padding, we can enter the following code in the blocked class in our CSS:
    .blocked {
    display: inline-block;
    background-color: red;
    padding: 10px 50px 10px 50px;
  }
Our entries for padding are very similar to our entries for margins. The first entry is the size in pixels for the top padding, followed by the right, bottom, and left. In this example, we'll have a 10 pixel padding on the top and bottom and a 50 pixel padding on both the left and the right.Check it out:
Notice how our mouse and cheese are both further from the edge of their blocks? Once again, our mouse is thwarted!
Now let's put all three together for maximum cheese security!
    .blocked {
    display: inline-block;
    background-color: red;
    margin: 0px 50px 0px 50px;
    border: 20px solid blue;
    padding: 10px 50px 10px 50px;
  }
Behold! That is one safe cheese!
Mwahaha! Not this time, mouse!
...
Sorry about that, little guy. We're all done here. Here you go!